Directories
Directories help you segment and separate your applications. In many ways, they reflect folder systems, where user groups may have permission to a certain set of applications. Here we use directories for the following reasons:
- Restrict application communication: Ensure applications can communicate to one another, securely. This prevents external apps from communicating to authorised applications when they shouldn’t.
- Team specific applications: Teams can use widely different applications. This enables you to create groups of applications refective of internal team usage.
- Development Environments: Folders can reflect development environments, such as development, staging, testing or prod.

Creating Directories
With Connectifi, applications interoperate by connecting to the same directory. The directory determines what applications can participate and defines the security parameters. Applications and their mappings to contexts and intents are all defined within a directory.
To create a directory:
- Sign into the Connectifi admin UI at https://platform.connectifi.app . If you have an enterprise instance of Connectifi, a custom URL is created for your environment, typically:
account_name.connectifi.app. - Click on the ‘Directories’ in the Left hand nav. Here you will be presented with a grid or list view of all of your directories.
- Click on ‘Create Directory’, in order to create a new directory.
- Begin filling in the name and description of the directory to determine the objective of the directory.
- Add your directories logo. We recommend a 256x256 png.
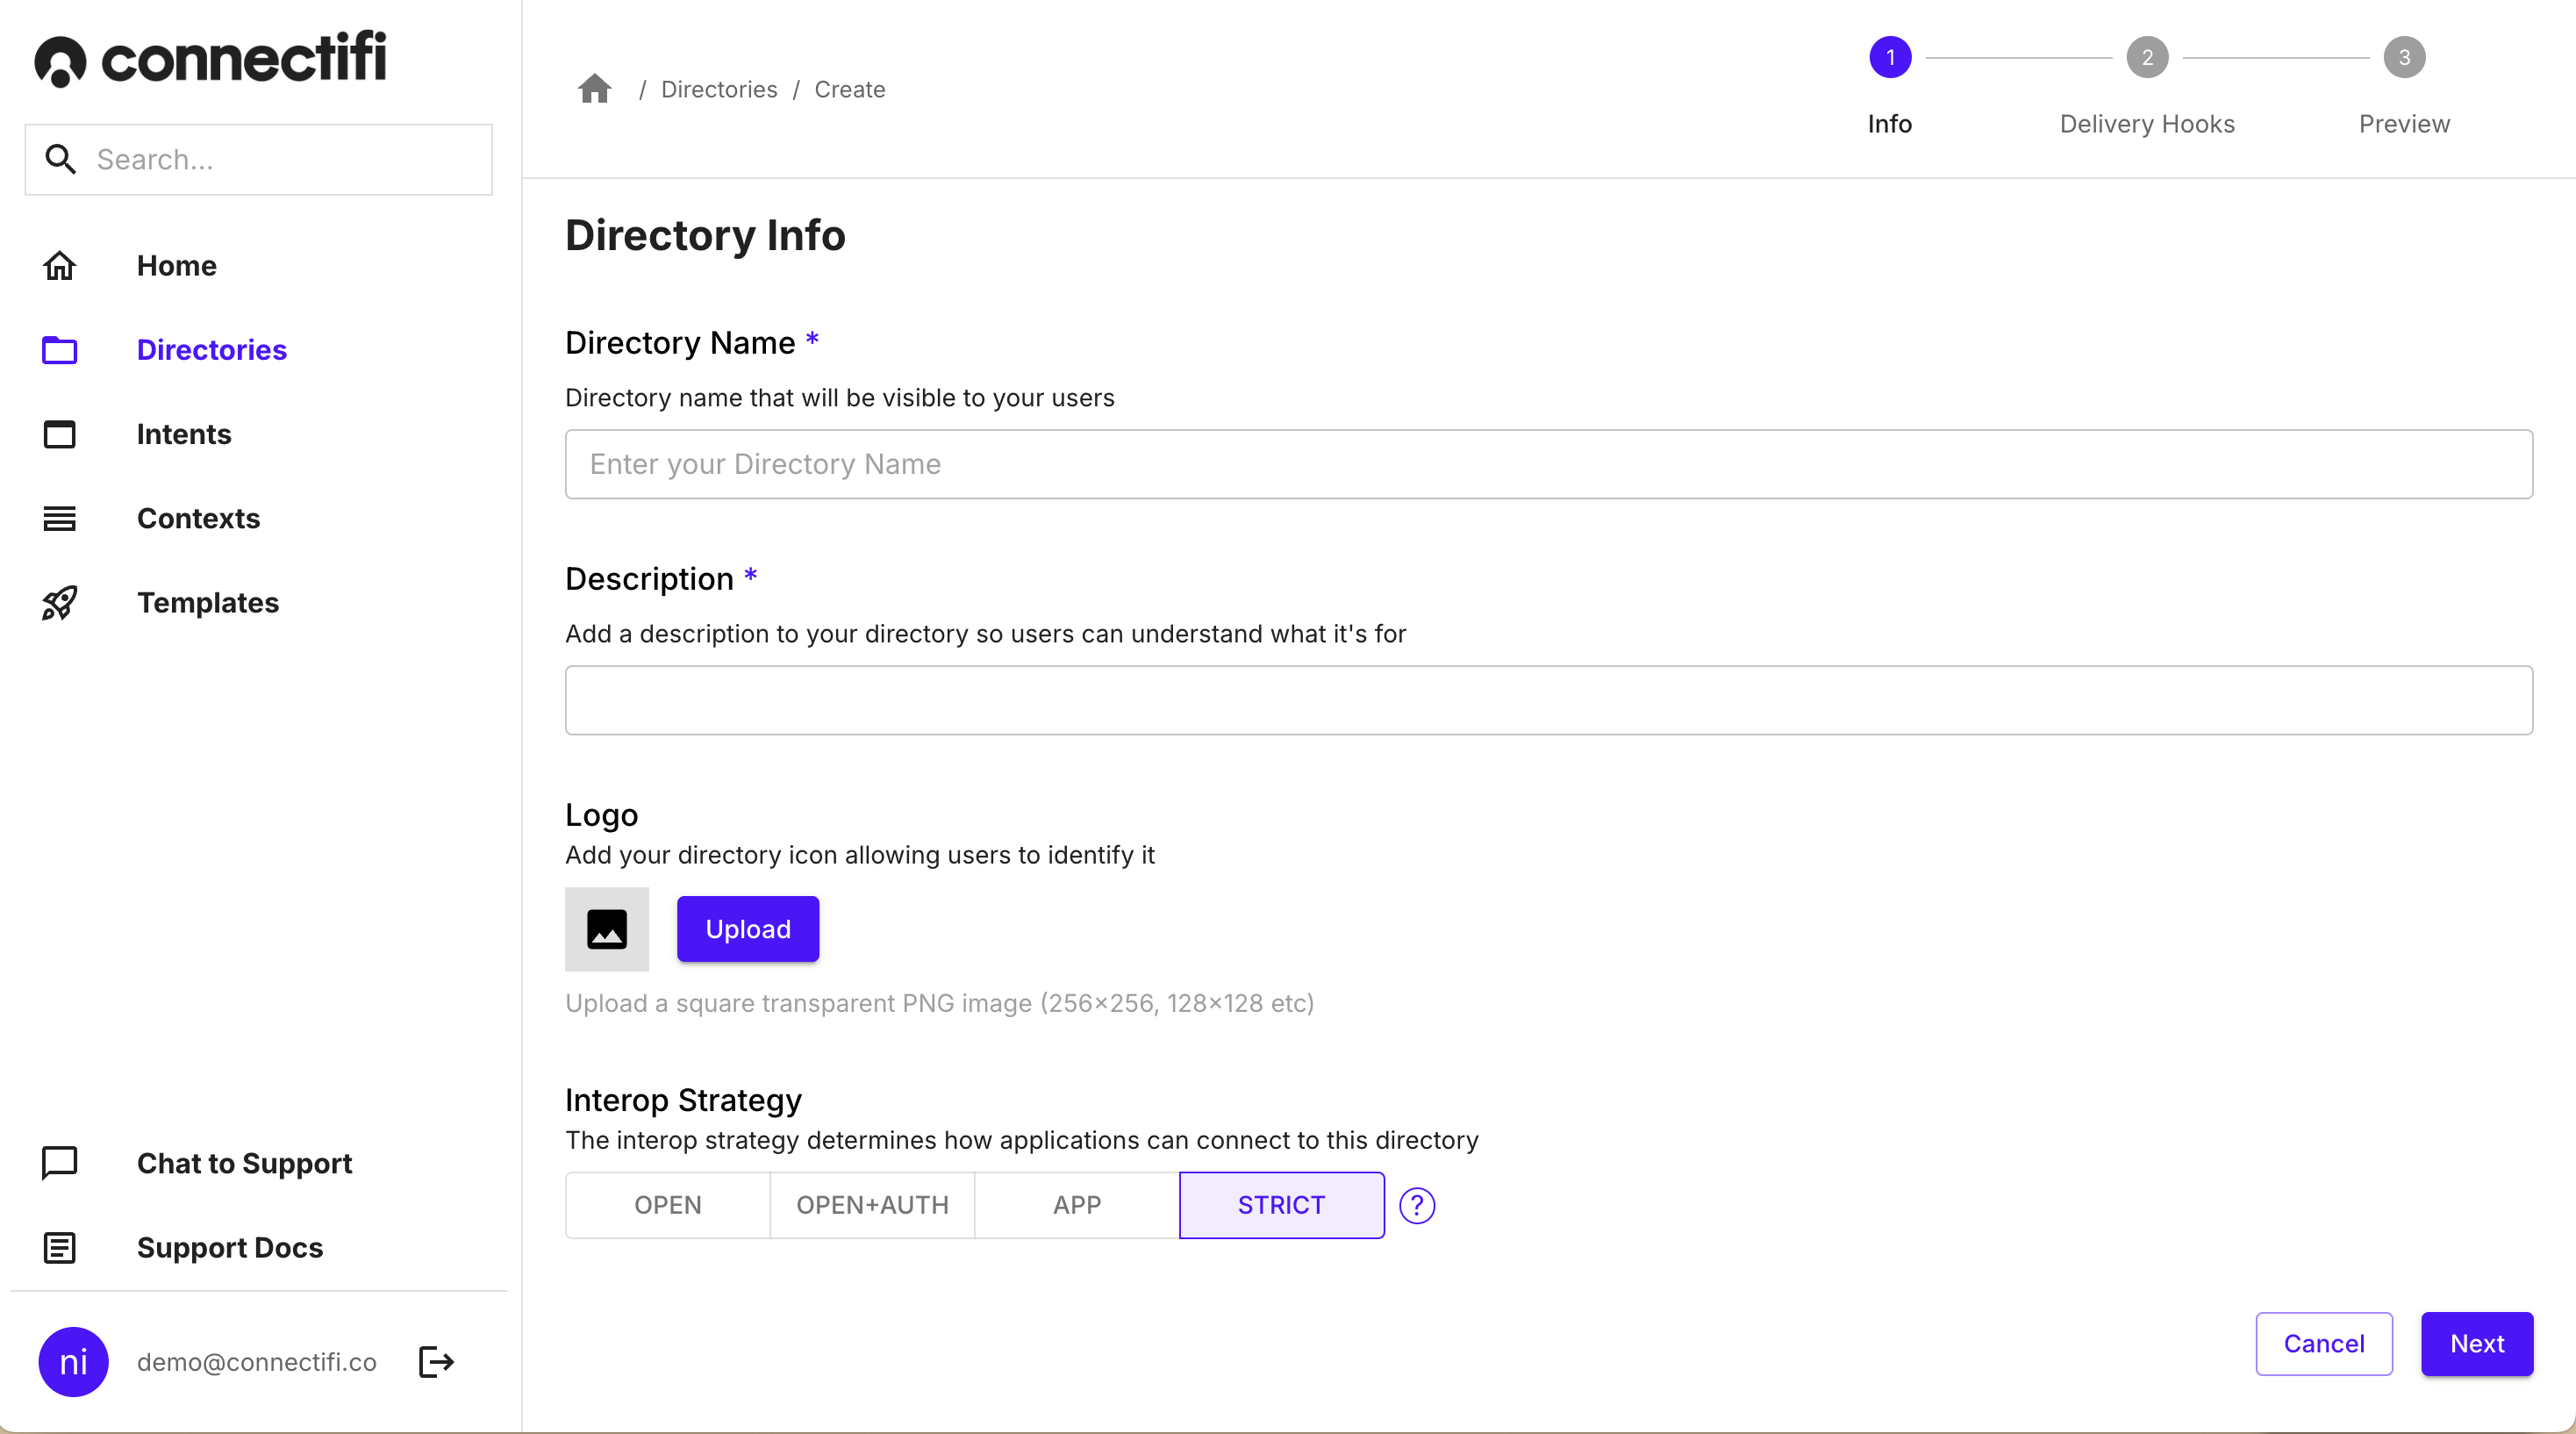
- The “Interop Strategy” setting determines the security and access model for the directory
- Open: Any applications can connect to the directory
- Open+Auth: Any application can connect to the directory, but the user needs to be logged into Connectifi to connect to the directory.
- App: Only applications registered in the directory can connect to the directory
- Strict: Users must be logged into added applications and said applications must be registered in the directory in order to connect to the directory
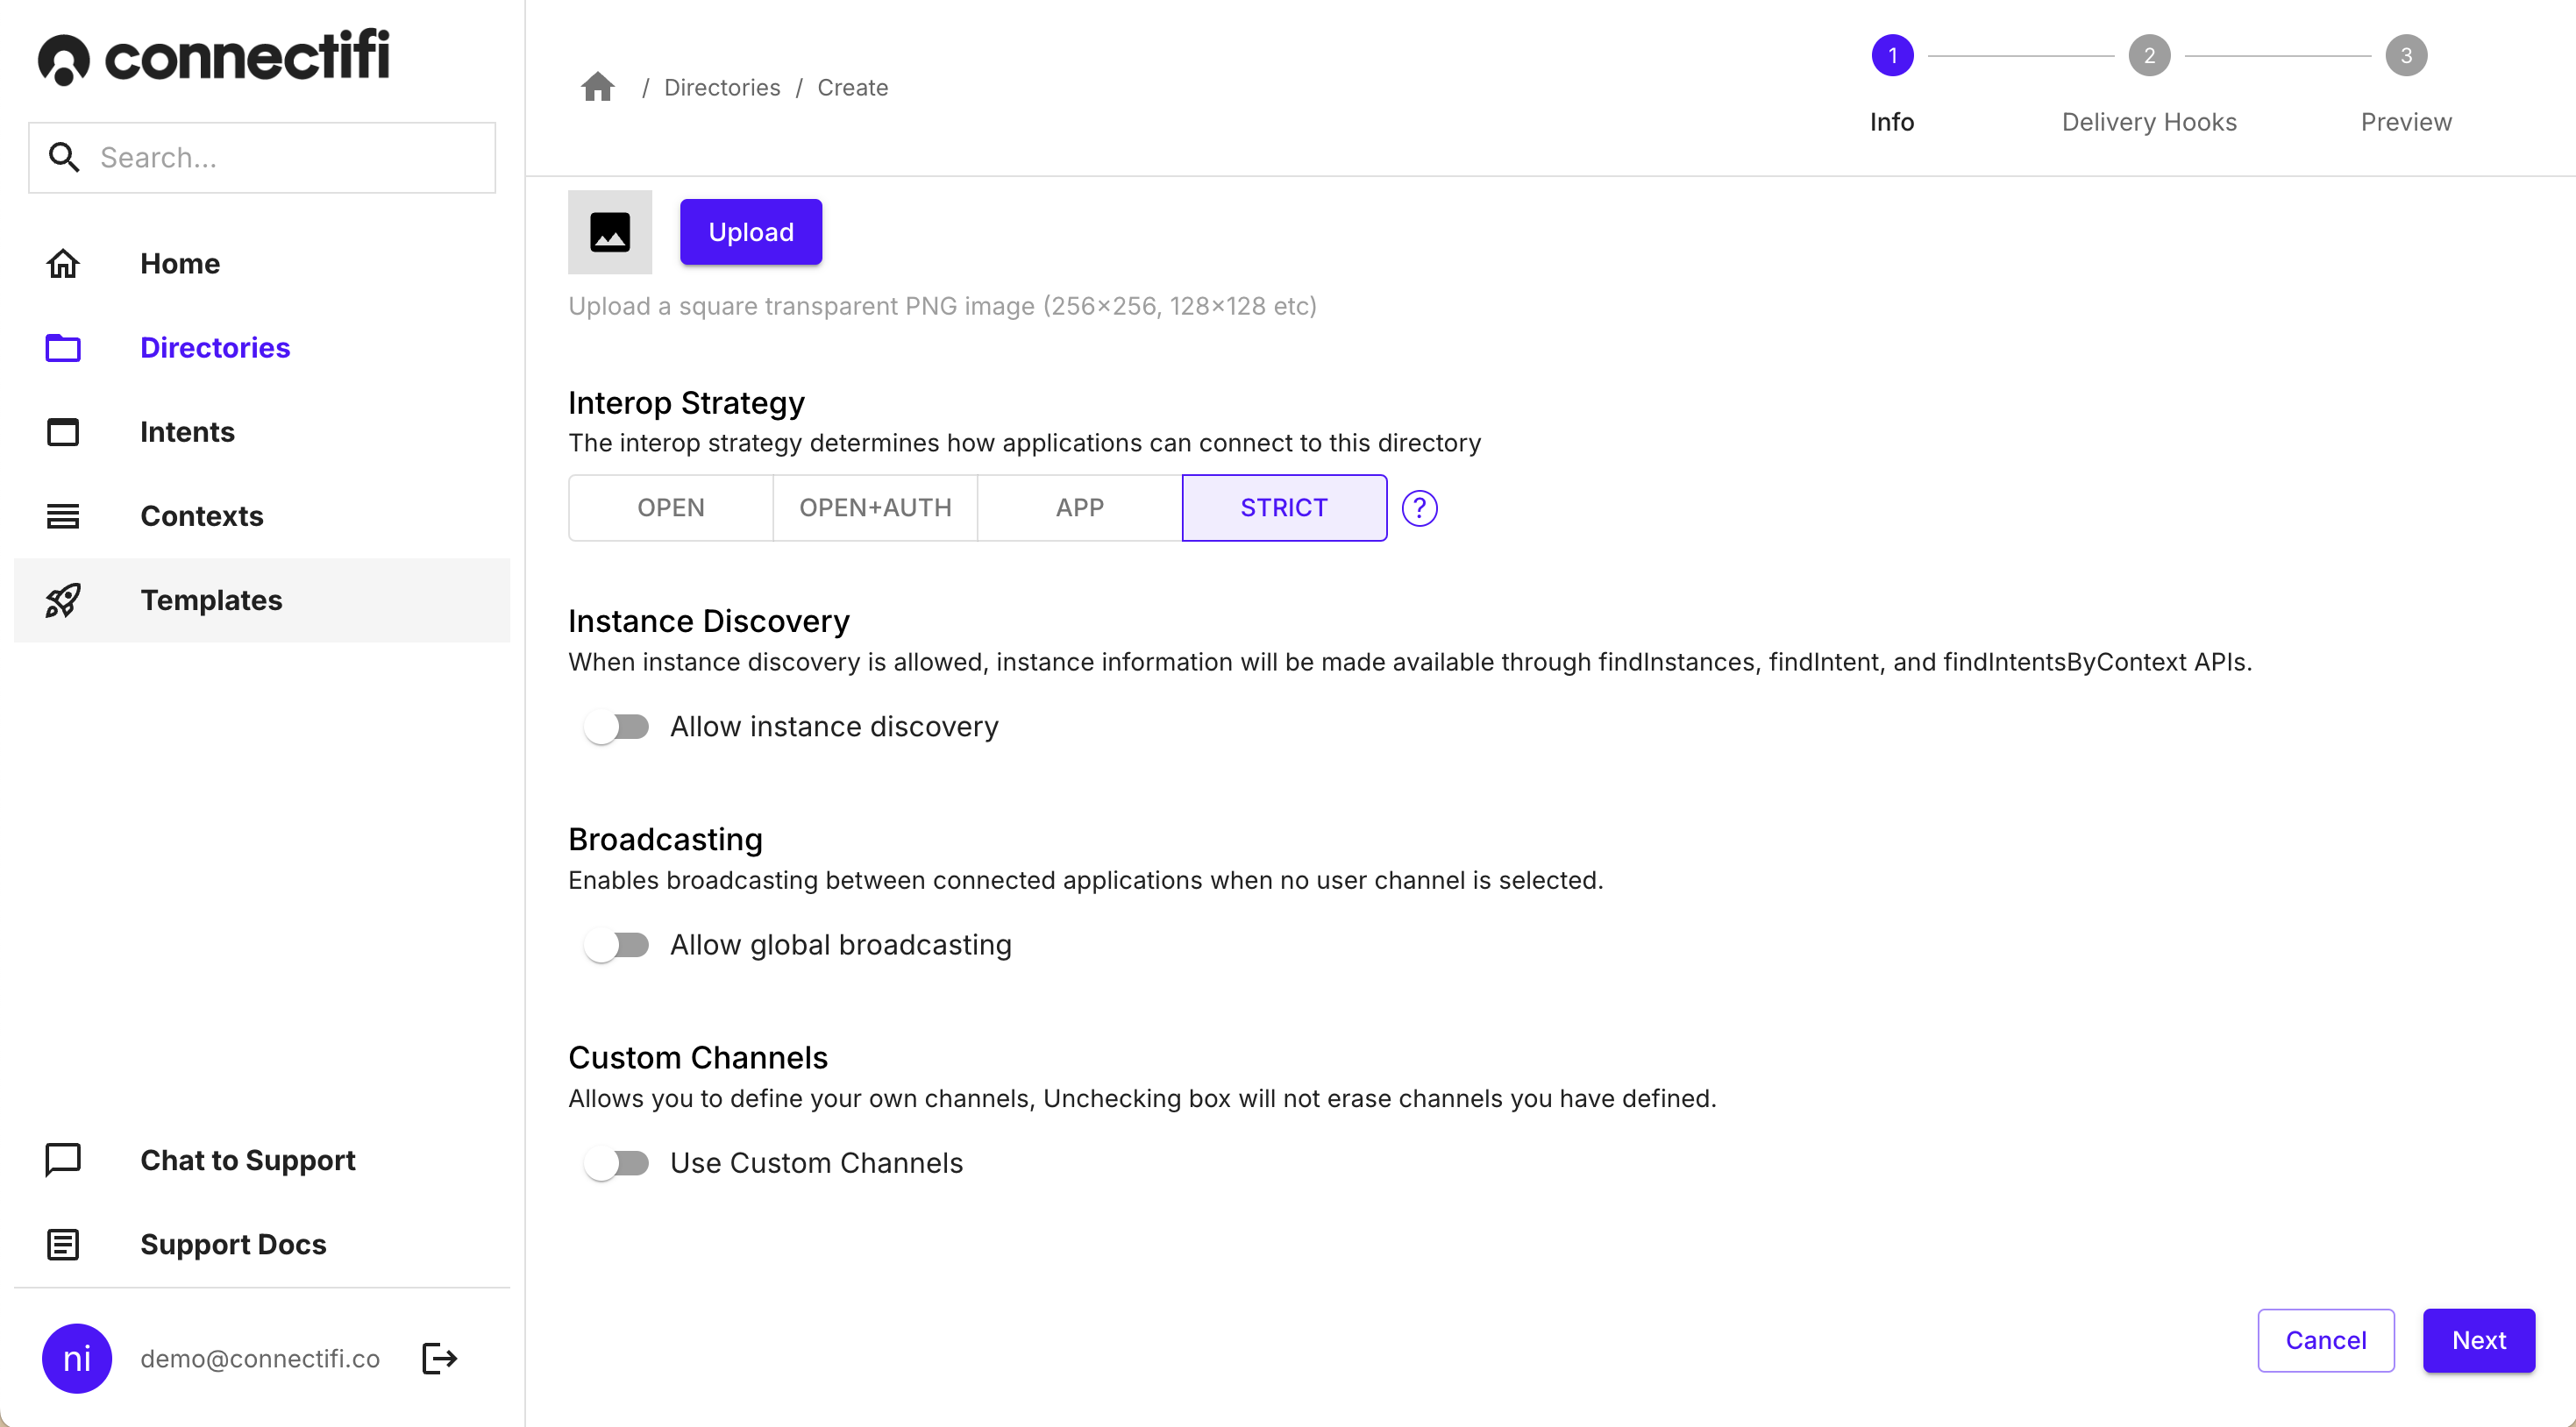
- The “Allow Instance Discovery” option restricts how much data applications can access via the FDC3 API
- Broadcasting, provides a default communication bus, where if an application sends a message it will send it to all other applications. This is simpler, than having channels, which provides you the ability for apps to be grouped onto the same communication channel.
- The “Delivery Hook” setting allows you to specify an endpoint that can transform context data sent from broadcast or intents in the directory. This can be done on a per/context data type basis and can be used to normalize and enhance context transferred between applications as well as to redact and enforce data security policies.
- Click the ‘Create’ button at the bottom of the page to complete creating your directory.
Edit Directories
- From the directories level: Click on the actions on the directory card. Select ‘Edit’ to begin editing or ‘Settings’ to view all of the settings.
-
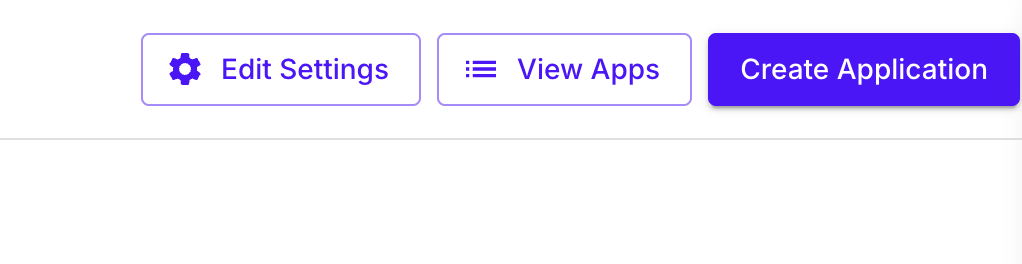
From view directory: Click on the upper right ‘Edit Settings’ button.
-
Don’t forget to click ‘Update’ when you’ve completed your changes. Changes will take immediate affect.
Connecting to a Directory
Directories determines what applications can participate and what the security parameters will be. Any application using the Agent SDK makes a connection to a directory.
To connect to a directory, use the createAgent function exported from the agent-web module, and pass in the service URL and the identity of your application. This will return a Promise resolving to a standard FDC3 API.
import { createAgent } from '@connectifi/agent-web';

        const fdc3 = await createAgent(
              `https://platform.connectifi.app`,
              `$[appName]@$[directoryName]`,
            );
Note: Because the FDC3 API is returned as a scoped variable, your application can leverage any number of approaches to FDC3. For example, the API can be used in module scope - allowing for multiple connections on a page, or it can be declared as a global - providing backwards compatibility with desktop container patterns. Also, the connection to the service can be multiplexed to allow for multiple FDC3 ‘apps’ in a single page. For an example of multiplexing, see this open source repo .
Delivery Hooks
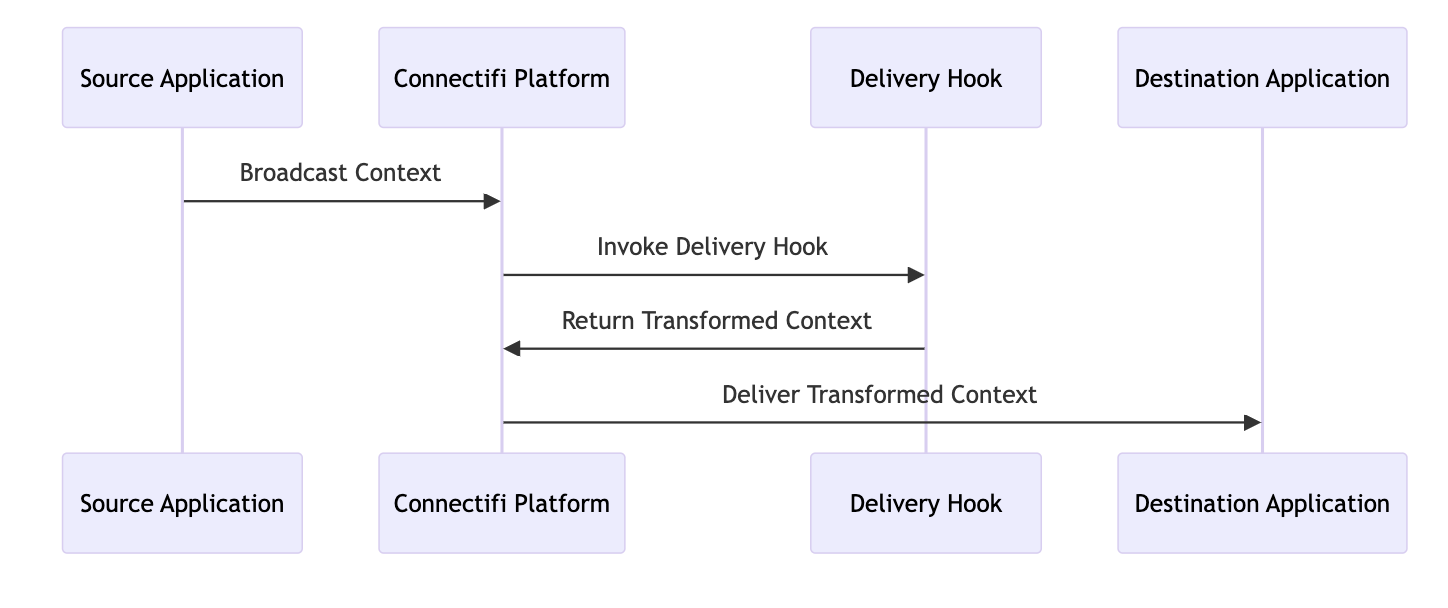
Connectifi Delivery Hooks enable the transformation and enrichment of context data just before delivery either as the result of an intent or broadcast. This capability is essential for scenarios where data needs to be standardized, enriched with additional details, or redacted for security and data privacy purposes. Example use cases for Delivery Hooks include:
- Enriching a financial instrument context with standard reference data such as company name
- Filtering or altering the context data payload based on user entitlements
- Performing destination-specific mapping of identifiers
Delivery Hooks are simple web services that are called as part of Connectifi’s message queue. They are configured on a per Directory basis and to handle specific context data types.
Implementing a Hook
Request and response JSON for a hook is described below. The hook receives a POST request with a payload comprised of:
- the source application
- the FDC3 context
- an array of destination applications
The hook response can contain two top level items: context and changes. If the context is set at the top level, it applies to all destinations unless the changes property is also defined. The changes property is an array of destination/context pairs that allows for full tailoring of the context flow.
Request Body
{
    context: FDC3Context,
    source: FDC3AppName,
    destinations: FDC3AppName[],
}
Response Body
{
    context?: FDC3Context,
    changes?: [
        {
            destination: FDC3AppName
            context: FDC3Context
        },
      . . .
    ]
}
Using the SDK
The Connectifi SDK provides type support and helpers for developing delivery hooks, action handlers, and receptors.
Relevant types in the SDK are:
- DeliveryHookHandler - convenience interface for implementing a delivery hook
- DeliveryHookRequest - the request data a delivery hook implementation will receive
- DeliveryHookResponse - the response data a delivery hook implementation must return
- DeliveryHookChange - the changed context for a single destination
Configuration
Hooks are added to specific directories. Edit your Directory settings and go to the ‘Delivery Hooks’ step.
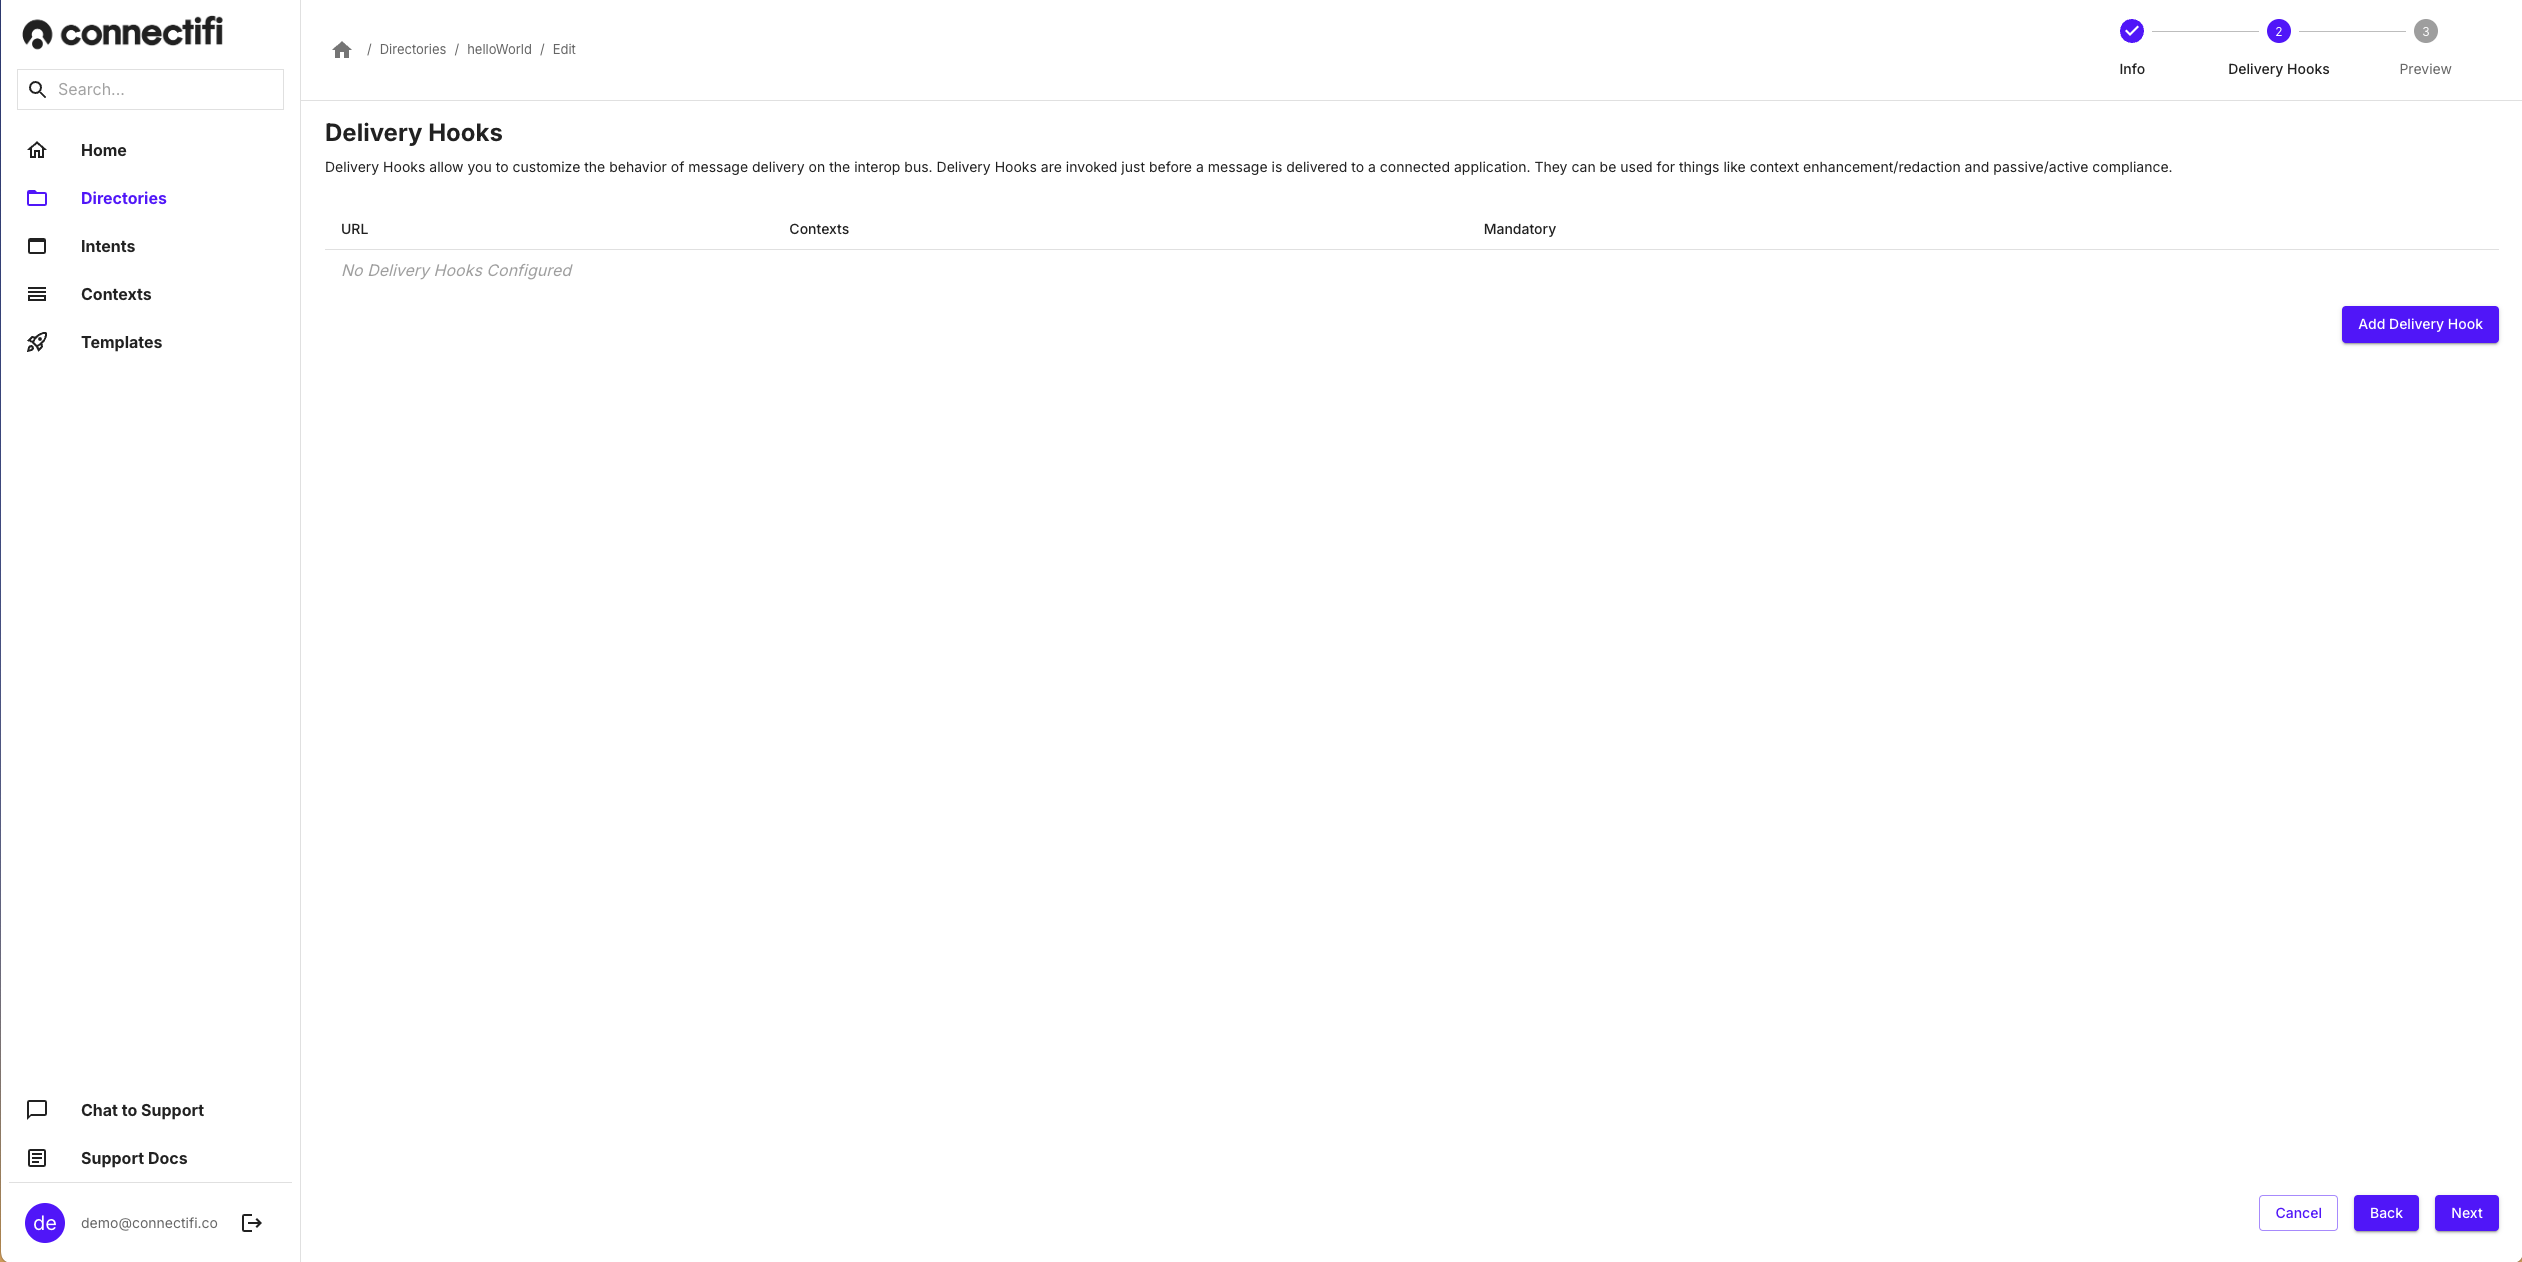
To add a Delivery Hook, enter the URL end point and specify one or more Context Data type for the hook to intercept. Note: a hook can intercept more than one type of Context Data, but there can only be one hook per type in a Directory.
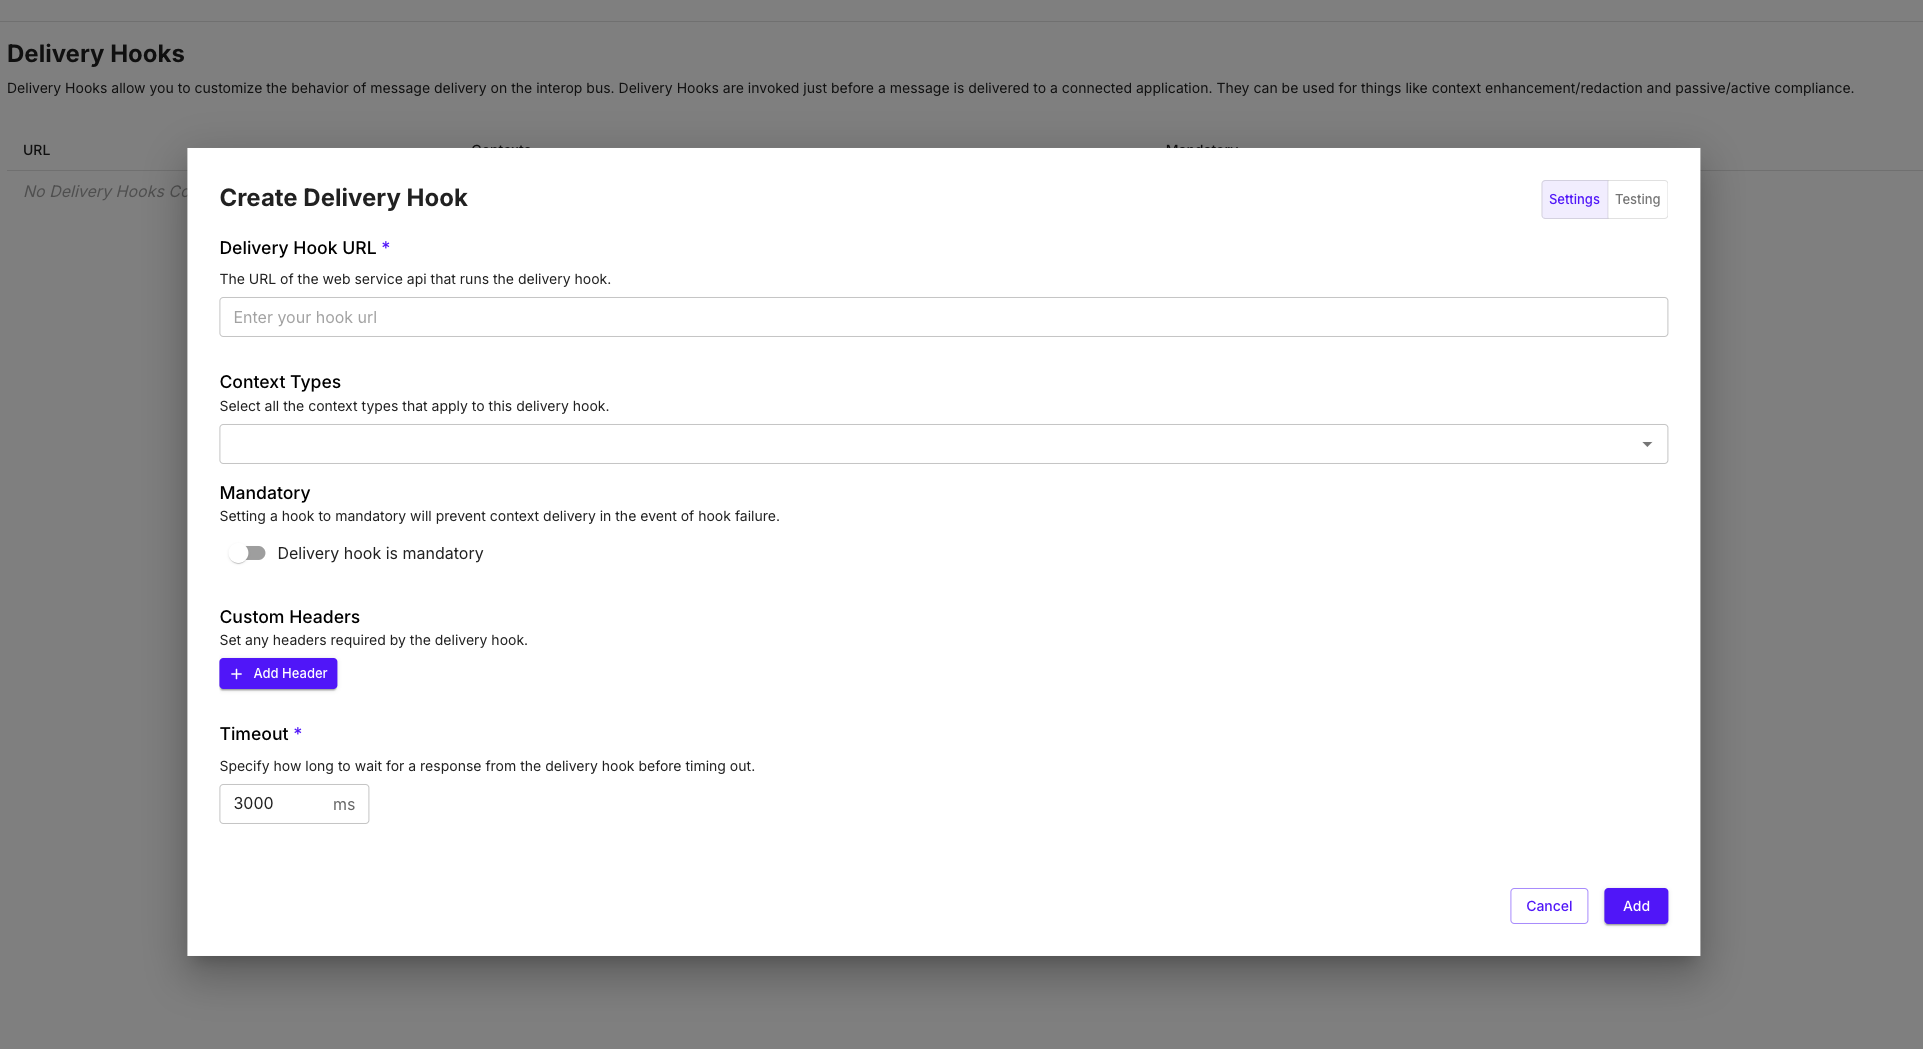
Additionally, you can customize these properties for your hook.
- Mandatory: if set to mandatory, delivery of the context data will be aborted if the hook fails to run (e.g. if the hook times out).
- Custom Headers: defines any number of headers to append to the request to the hook. E.g. an API Key or Bearer Token for accessing the hook.
- Timeout: set a custom timeout value for the hook.
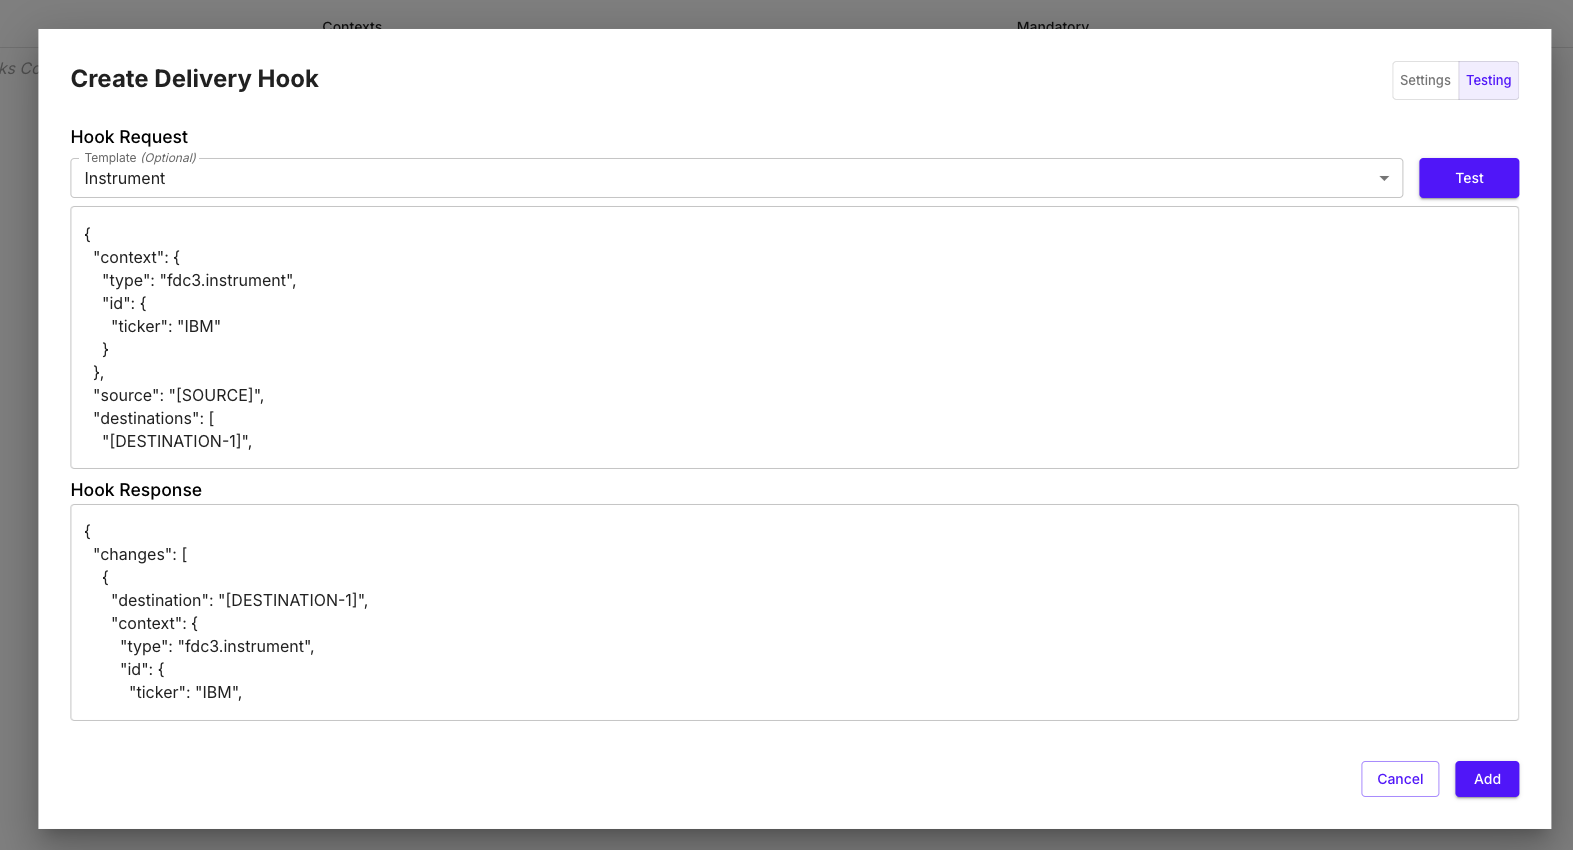
The admin UI also supports testing the hook inline. Some templated requests are provided, or enter your own as needed.
Examples
Here is an example of Delivery Hook code enhancing an fdc3.instrument Context Data type.
import { Context, ContextTypes } from '@finos/fdc3';
import { DeliveryHookHandler } from '@connectifi/sdk';
import { RequestError, ServerError } from '../types';
import { EXTERNAL_API_URL } from '../constants';

export const enrichInstrumentHook: DeliveryHookHandler = async (request) => {
  const apiKey = process.env.EXTERNAL_API_KEY;
  if (!apiKey) {
    throw new ServerError('External API key missing');
  }

  const { context } = request;
  if (context.type !== ContextTypes.Instrument) {
    throw new RequestError('Unsupported context type');
  }

  const enrichedContext = await fetchAdditionalInstrumentData(apiKey, context as Instrument);
  return { context: enrichedContext };
};

const fetchAdditionalInstrumentData = async (
  apiKey: string,
  context: Instrument,
): Promise<Context> => {
  const ticker = context.id.ticker;
  const response = await fetch(`${EXTERNAL_API_URL}/instrument/${ticker}`, {
    headers: {
      'Authorization': `Bearer ${apiKey}`,
      'Content-Type': 'application/json',
    },
  });

  if (!response.ok) {
    throw new ServerError('Failed to fetch additional instrument data');
  }

  const data = await response.json();
  return { ...context, additionalInfo: data };
};
This example, shows how multiple context types can be handled within a Delivery Hook
import { Context, ContextTypes } from '@finos/fdc3';
import { DeliveryHookHandler } from '@connectifi/sdk';
import { enhanceInstrument, enhanceOrder } from './enhancementFunctions';

export const multiContextHook: DeliveryHookHandler = async (request) => {
  const { context } = request;

  switch (context.type) {
    case ContextTypes.Instrument:
      return { context: await enhanceInstrument(context as Instrument) };
    case 'fdc3.order':
      return { context: await enhanceOrder(context as Order) };
    default:
      return {}; // Pass through unmodified
  }
};
You can find many more full examples of Delivery Hooks and clone or fork them from our open source Connectors repo on Github!